Aren't the ladies from MILLINER MISSES beautiful in blue and yellow?


 Gingersnap Creations is also focusing on using child playthings in our art...crayons, clay, etc. All good stuff...but I never had kids so I don't have much of that laying around the house. :( In the quest for this card background I tried the following:
 Below are the two backgrounds I did. Besides the strip I used curves and swirls; and even dotted a bit.
 background #1 - SU! Certainly Celery & Old Olive
 Background #2 - Tempting Turquoise & Taken with Teal.
 One of the papers we used was Oriental Calligraphy paper. The best way to describe this is really stiff tissue paper. It's very thin but will hold up to lots of water. You can find it here on Fred's web page.
 We used Adirondack Colorwash in a variety of strengths, but any color wash/mist will work. I used Glimmer Mist for this card. I chose 4 colors (Key Lime Pie, Sunflower, Turquoise Blue, and Tiger Lily) and started with the lightest and randomly sprayed on part of the paper.
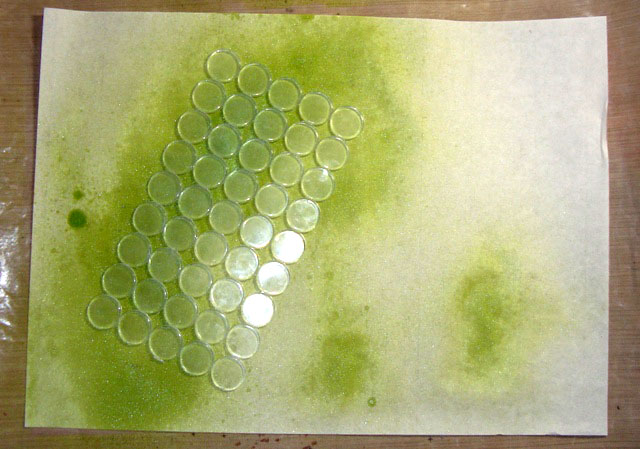 Then I used several kitchen items as masks (penny sink mat, sushi mat, rubber shelf liner). Spraying other colors over the masks, flipping them over onto other sections, and making an "elegant mess".
 Then I let it dry for a bit. You can use a heat gun to speed things up - I did to finish the drying.
 24 hours before I started, I choose three Twinkling H2Os (Dreamsicle, Summer Breeze, Apple Blossom). I filled each pot up with water and let it sit. The water made the H2O's very "gloopy"...kinda like Elmers Glue.
 In Fred's class he had little window template so you could figure out where in your sheet you wanted to cut. He has one on his web page - CROPPING TOOL TEMPLATE. There's also a short video. Note the PDF template does not have the marking holes.
 He also has a template for the card base - the rectangle works perfectly with the template. As you can see this card would be perfect without any further embellishments. I choose to stamp the Stampin' Up geisha over the color block. Even my "sits on top of everything" Archival black wasn't 100% crisp.
 Just a little Asian influenced card.
 For the kimono I stamped these Stampin Up two-step flowers and used a Hero Arts background stamp. I have to rave about the new Amuse Studio pigment inks! They have great coverage.
 I used the stamp positioner to line up the kimono stamp image. Then cut out the image and collaged the card. The green polka dot paper was stamped with VersaMark and glitter embossing powder.
 This is very simple card. Memory Box paper covering the entire card base. The circle is a new Memory Box circle script stamp and over-stamped with the butterfly collage. I used two Stampin Up colors: River Rock and Pacific Point. It fits perfectly in one of the Nestability circles. A swirl of rhinestones (of course). And the "B" and butterfly are both stickers. I brushed a little talcum powder on the back of the butterfly sticker to get it to "stand up".
 I wanted to do something a bit different with the tea bag template. AND I wanted to make a Valentine gift for my mom. The original template is posted here. I bumped up the size of the tea bag template just a bit and made a mini album with some pictures I took at Christmas. The mini album is titled GG's BB (Great Grandma's Brag Book).
 I increased the size of the template just a enough to hold 4x4 pictures. The width is 4.5" (not 3.5" ) and the length is 12" (scored at 5", 5.5", 6", and 11").
 I used magnets on the inside flaps.
 I cut 3 sets of pages 4" x 9.5" and scored in the middle. This gave me 6 pages for pictures. I used my paper piercer to make holes in the center at 3/4", 2", and 3 1/4". I placed the pages inside the tea bag and punched again.
 I used scrapper's floss as binding thread. It's a simple figure eight. The ends of the floss come from the inside to the outside - end and center holes. The thread from the center goes into the other side and out through the middle again.
 Then the threads are pulled tight.
 And a knot is tied near the outside center. There's a photo section in each tea bag valley.
 I picked some of my favorite pictures from our Christmas trip to meet Julian and used Photoshop to make them sepia toned. I printed 4" x 6" but trimmed them down to 4" x 4".
 I left pages blank for future additions...
 ..and included a picture of all the family members. (Here's my nephew, Adam, who finally out grew Grandma).
 Coffee Filters? I have to say my first thought was DO I HAVE ANY COFFEE FILTERS? (remember - Diet Coke thru and thru). But I did find some in the back of the cabinet, lost and lonely.
 Stamp background image on coffee filter with embossing ink. Heat set clear embossing powder.
 Saturate the coffee filter with Glimmer Mist. Slowly dry with heat gun. Be sure not to burn the filter or re-melt the embossing powder. I found that setting it on another coffee filter to absorb some of the moisture helped.
 Put the dry coffee filter between two pieces of typing paper and PRESS (don't iron) with a hot iron. I've tried this with a craft iron before but they don't get hot enough.
 You should press until the embossing powder is soaked into the typing paper.
 I cut a background sheet slightly bigger than the finished size and ran it thru my Xyron. If you don't have a sticker maker - just be sure to hit the edges of the paper with your adhesive.
 Place your sticker sheet on the part of the filter you want to use. Trim the edges and finish your card.
 This is a new recipe for me - Pistachio-Cranberry Biscotti - taken from last year's Betty Crocker's Christmas Cookie book (you know--the ones at the grocery check-out that look so darn good!)
 It doesn't have a lot of ingredients but it does have a lot of steps. So, it didn't fit on the standard card. I solved that problem with a flip page. The paper and image is all Stampin' Up.
 You remember my Tim tag from day #2. You might have wondered why I made a BUNCH of them. It's simple...they were the fronts to a recipe. People always ask me what I do with my tags. I generally just stand them in a box to look at now and then. This seems like a better use!
 Here's the back - my Grandmother's Ginger Snap recipe. I have to say it's my favorite Christmas cookie.
 I started with two blue papers from Stampin Up (Not Quite Navy and Night of Navy. I wasn't sure how the bleach would react with the paper. This is the Night of Navy and you can see that it bleached out to a "tan" color. (The Not Quite Navy turned a pink color - yuck!) After that dried I stamped with the same color SU! ink over the bleached fish.
  There are two recipes that my Mom makes that I will miss when she's gone. And that's not to say, I can't make them...but I think it's the LOVE inside that makes it taste different. I still miss my grandmother's banana bread and she's been gone for 29 years now. APPLE CHEESE CRISP is one of those recipes my mom makes better than anybody!! In fact, it's often my birthday "cake". (GRIN)
 Red Apple Copics
 Pail Copics
 Green Apple Copics
 My page is really 2.25x4, but it was a pre-cut piece of card stock I had gotten from Stampin Up! I also ordered the small glassine envelopes that held the "tag". This is a "Tim" technique of stamping the image with a white dabber (or acrylic paint) and then sponging color over it. A damp towel removes the ink and returns the "whiteness" of the stamped image.
 This is a combination of Technique Junkies methods: Faux Designer Paper (which is one of my favorites) and Torn Frames. I used a combo of Distressed Inks for the background paper and the main image. I highlighted the palm tree with white gel pen and my favorite glitter pen (adds shine but not color).
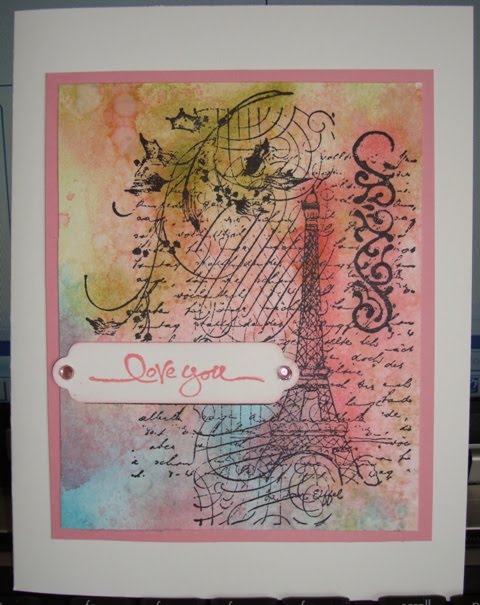 LOVE - this was a Distress Ink background - smoosh 'n' spray. The stamp is a Christmas stamp but other than a bit of holly on the spray and the sentiment it's great stamp. The sentiment was Stampin Up! I used a small sponge to highlight areas of the image
 HELLO/THINKING OF YOU - the image was colored with Copics and cut out. The rest is just that great Basic Grey ORIGINS paper.
 THANK YOU - Stamped the bamboo image on plain card stock. Then layered the HAIKU paper. The doll image was colored with Copics.
 CHRISTMAS - I love this Santa! It's such an iconic image. I stamped with Distressed Ink and no other color.
 Why the "Valentine's Day" treatment? Simple - my mom always made/makes this recipe in a heart-shaped mold. I used a lot of Nesties and punches on this - the only thing that is stamped is the label. I love the concept of the Just Rite stamps - the ability to create custom word borders or tags. But I struggle every time to get a clean stamp. There's always a edge or incomplete stamp on the letters. And the miniature letter blocks are an exercise in patience and steady hands! But this small 1 5/8" size works well. maybe there's not as much surface area.