Showing posts with label Glimmer Mist. Show all posts

Friday, December 9, 2011

Tim Tag 2011 - Day 9

Wow...I really like Tim's Day 9 tag and I like mine better! (grin)

I liked that Tim's tag looked like vintage wallpaper, so I looked for a similar stamp. I don't think I've ever inked up this Stampabilities motif stamp. But it was perfect for this tag. I used Victorian Velvet and Shabby Shutters.
I made mine more feminine with the doily and flowers (a Prima set from several years ago). The letters I painted with Glimmer Glam. It's my first time using that, it's got great shine but I wish the brush were bigger/longer!

Looking forward to Day 10!

Friday, December 2, 2011

TIm Tag 2011 - Day 2

So this was a pretty quick tag. Tim's Day 2 tag was pretty simple and retro today.

I didn't have Tim's kraft paper but I did have the holiday collection. I love the vintage Santas. I had the deer die Tim used today, but I decided to use the lamp post.

I decided to use the felt snowflake and a calling card "SNOW" from Red Lead. Similar to yesterdays but I really like this. The holly leaves were covered in Rock Candy Stickles. And I sprayed the tag with Glimmer Mist Marshmallow.

See ya tomorrow!

Wednesday, May 18, 2011

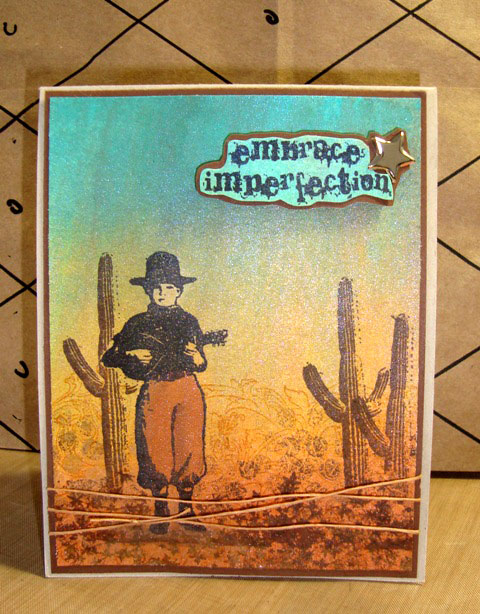
GC103: The Singing Cowboy

This week Gingersnap Creations is creating a scene! A stamped scene that is!

I started with a background technique called PULLED GLIMMERS - using Patina, Sunflower, and Sugar Maple.  Then stamped the cowboy, masked him, and stamped the bottom foliage and cacti.

Stamps: Artistic Outpost THE SINGING COWBOY and ROUTE 66; sentiment Stampers Anonymous
Paper: cream, kraft, brown cardstock
Ink: Archival Coffee, Distress Inks
Accessories: Glimmer Mist (Sugar  Maple, Sunflower, Patina) twine, star brad
Technique Junkies: Pulled Glimmers - June/July 2010

Gingersnap Creations has a great sponsor this month - Technique Junkies Newsletter!

I've been a subscriber for many years and love the detailed, step-by-step instructions in each issue of the newsletter. 

Stamps: Artistic Outpost THE SINGING COWBOY and ROUTE 66; sentiment Stampers Anonymous
Paper: cream, kraft, brown cardstock
Ink: Archival Coffee, Distress Inks
Accessories: Glimmer Mist (Sugar  Maple, Sunflower, Patina) twine, star brad
Technique Junkies: Pulled Glimmers - June/July 2010

Wednesday, April 20, 2011

GC99: Fans

Continuing with the Asian inspiration over on Gingersnap Creations - today's challenge is FANS!

I took this more figuratively then literally. I opted to make a fan-fold medallion to highlight my koi.

When I make a background with a spray and/or ink method, I will use a clean tag to "clean-up" any extra color on the mat. I did this background tag last week when I did the "mist" background.

I did a simple fan-fold medallion. This is two pieces of 12 x 1.5 - scored every 1/4 inch.

It's been a LONG time since I colored anything with Copics but I did do the gold fish.

Stamps: Great Impressions KOI, Memory Box DOT CIRCLE
Paper: tag, orange scrap
Ink: Memento
Accessories: Glimmer Mist, Twinkling H2O's, left ribbon, pearls, yarn

Wednesday, April 13, 2011

GC98: Mists

It's Wednesday! That means another Gingersnap Creations post!! Today we're playing with Mists!

I have a VERY GOOD local stamp/scrap store. Kathy is great at bringing in traveling teachers. Several months ago, Fred B Mullett came to teach some messy but FUN classes. I took THE ELEGANT MESS. This is just one of the techniques we did that night to make incredible, 0ne-of-a-kind backgrounds!

One of the papers we used was Oriental Calligraphy paper. The best way to describe this is really stiff tissue paper. It's very thin but will hold up to lots of water. You can find it here on Fred's web page.

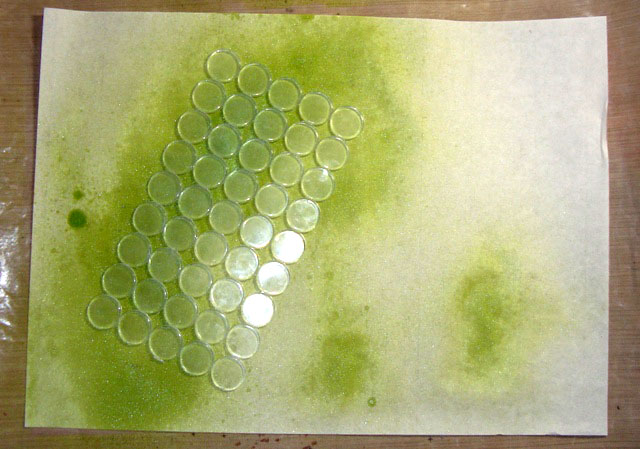
We used Adirondack Colorwash in a variety of strengths, but any color wash/mist will work. I used Glimmer Mist for this card. I chose 4 colors (Key Lime Pie, Sunflower, Turquoise Blue, and Tiger Lily) and started with the lightest and randomly sprayed on part of the paper.

Then I used several kitchen items as masks (penny sink mat, sushi mat, rubber shelf liner). Spraying other colors over the masks, flipping them over onto other sections, and making an "elegant mess".

Then I let it dry for a bit. You can use a heat gun to speed things up - I did to finish the drying.

24 hours before I started, I choose three Twinkling H2Os (Dreamsicle, Summer Breeze, Apple Blossom). I filled each pot up with water and let it sit. The water made the H2O's very "gloopy"...kinda like Elmers Glue.
By scooping a little color out onto my mat and adding a bit more water, I could stamp with it (Apple Blossom and Memory Box Sonoma Print). Or fill my brush and fling it. The final result is a large piece of background that can be used for multiple card!

In Fred's class he had little window template so you could figure out where in your sheet you wanted to cut. He has one on his web page - CROPPING TOOL TEMPLATE. There's also a short video. Note the PDF template does not have the marking holes.

He also has a template for the card base - the rectangle works perfectly with the template. As you can see this card would be perfect without any further embellishments. I choose to stamp the Stampin' Up geisha over the color block. Even my "sits on top of everything" Archival black wasn't 100% crisp.

The final touch was a double coin knot. I used a thick paper cord in a turquoise blue.

Stamps: Stampin' Up! DREAM GARDENS, Memory Box SONOMA PRINT
Paper: Oriental Calligraphy paper, Neenah Solar White
Ink: Archival Black
Accessories: Glimmer Mist, Twinkling H2O's, found masking items, Japanese cord

Please join us in using MISTS at Gingersnap Creations! You have a month to make your entry.

Sunday, January 23, 2011

GC83: Snow, Pine, and Mahogany Color Challenge

Just slipping in under the wire here with last month's Gingersnap Creations Color Challenge: SNOW, PINE, and MAHOGANY!
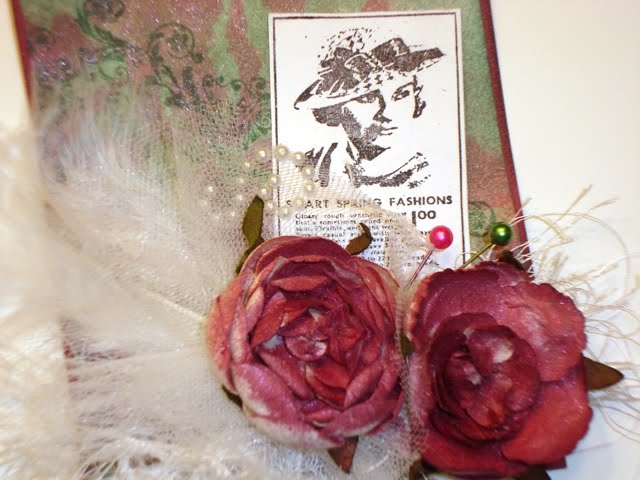
I've been wanting to try the Tattered Angels CHALKBOARD Glimmer Mist, so I bought two bottles over the holidays - Evergreen and Strawberry Shortcake. I sprayed the tag with Evergreen and then placed a mask over that and sprayed with Strawberry Shortcake. The neat thing about the Chalkboard GM is that it's opaque, not transparent like the regular GM. So the colors do layer with out loosing much of their own color personality. I did sponge a little bit with Pine Needles.

A close-up of the top of the tag.

And in this shot I think you can see the white netting.

Stamps: Hero Arts SMART STYLE
Paper: tag
Ink: Archival Jet Black, Distress Ink: Pine Needles
Accessories: Prima flowers, white netting, white feather, fuzzy yarn, pearl swirls, Glimmer Mist

Wednesday, January 12, 2011

Gingersnap Creations: COFFEE FILTERS


Coffee Filters? I have to say my first thought was DO I HAVE ANY COFFEE FILTERS? (remember - Diet Coke thru and thru). But I did find some in the back of the cabinet, lost and lonely.

My second thought was the classic SplitCoast technique FROSTED FILTER. I decided to morph that technique with another MULBERRY BATIK. And then add my own little twist. Below is what I did for the background.

The image was stamped on white with Black Soot and covered with clear embossing powder (for that glossy, wet ink look). The image was watercolored with Distress Inks. Oh, and my choice of image came more from the "tea" side of the monthly theme. When I think of the far east, I think of green tea.

Stamps: Stampin Up! ORIENTAL BRUSHSTROKES, A Muse sentiment, Hero Arts CHINESE THANK YOU
Paper: coffee filter, Neenah Solar White, black scraps
Ink: Distress Ink, embossing ink
Accessories: clear embossing powder, Glimmer Mist (Tiger Lily, Sunkissed Peach, Viva Pink, Tuscan Sunset)

If you'd like to play along with the Gingers, you have a MONTH to post your interpretation of COFFEE FILTERS on the Gingersnap Creations post. Be sure to stop by here and leave me a link to your creation too!

Have fun - stay warm - see you next week!

Stamp background image on coffee filter with embossing ink. Heat set clear embossing powder.

Saturate the coffee filter with Glimmer Mist. Slowly dry with heat gun. Be sure not to burn the filter or re-melt the embossing powder. I found that setting it on another coffee filter to absorb some of the moisture helped.

Put the dry coffee filter between two pieces of typing paper and PRESS (don't iron) with a hot iron. I've tried this with a craft iron before but they don't get hot enough.

You should press until the embossing powder is soaked into the typing paper.

I cut a background sheet slightly bigger than the finished size and ran it thru my Xyron. If you don't have a sticker maker - just be sure to hit the edges of the paper with your adhesive.

Place your sticker sheet on the part of the filter you want to use. Trim the edges and finish your card.

Saturday, December 18, 2010

Tim's 12 Tags of Christmas - tag #6

So...did you notice how much Tim's Day #6 tag looked like my Day #3 tag?

I'm just saying...trees...deer...hmmm.

Ok, there were differences but still. (GRIN)

Not wanting to repeat myself, I decided to take a different path. Tim's lesson was all about using the texture embossing plates and I had the snowman. I tired his stamping over the negative image to make it look like the snowflakes were behind the snowman. I played around with the sponging and used SNOW QUEEN Glimmer Mist for shine. I ended up putting Rock Candy Stickles on the snowman and outlining him with a white gel pen.

To add the dimension Tim had with the deer, I did one of my crystal snowflakes. The sentiment was a $1 special from Mike's.

Yesterday, I visited my local stamp/scrapbook store. They had just gotten in this new glass glitter - YUMMY stuff! It's big and chunky. And looks amazing on the snowflake!

I've never heard of this brand but I'll be looking for their stuff in the future.

Saturday, December 4, 2010

Tim's 12 Tags of Christmas - tag #1

I intended to post this last night but I had technical difficulties (my camera battery was dead!!)

I love the first of December when Tim Holtz starts posting his 12 Tags of Christmas. For one thing I always learn SOMETHING new! Second, Tim posts a lot about where he's teaching but rarely posts any of his work anymore. And third...his work is just AMAZING!! If you missed Tim's #1 tag look HERE.

So here's my tag. How does it differ from Tim's? Well for one I don't have the wonky house die Tim used. But I did have the embossing folder. So I cut GrungeBoard "chunks" out in a "bird house" shape. You know - a rectangle and triangle roof. I followed most of his steps for coloring and adding "snow". I used the same glass glitter that I use on my Crystal Snowflakes. And a branch I pulled off my mom's aspen tree (sorry mom!)

The background is pure Spray and Smooth - Distress Ink on a Teflon mat, misted with water, and smooshed. For a little shine I finished by spraying Glimmer Mist SNOW QUEEN.

I didn't have Tim's fence die, but I did buy Martha's Large Halloween fence. I just cut the bats off and it's a regular fence! I stuffed a little reindeer moss (I swear that's the name on the package). I didn't use Tim's technique for creating the ticket. I just stamped with Archival Coffee and sponged color on.

I tried dyeing my ribbon the same way Tim did but I just ended up with a blue ribbon (no color variations) and blue fingers! I added a small rusty snowflake charm to the ribbon.

I will be posting my other Tim tags today - and a BIRTHDAY GREETING for my niece JESSICA. So come back thru the day!!

Sunday, October 31, 2010

HAPPY HALLOWEEN!

Happy Halloween!!

Life is slowly getting back to "normal". I just finished my first month back at work and that's going well. Last weekend I taught my classes at ONE LITTLE SPARK in Tuckerton, New Jersey. A big thank you to Pat, Lee, Heather, and the ladies in the class!! I had a UBER WONDERFUL TIME!!!

Here are the tags we did in class! Hope you have a Happy Halloween!! (OH....and I became a GREAT AUNT DEB last Friday!!!! (yes, I was always "great" but now it's official!!)


Be safe tonight!!

Sunday, August 15, 2010

Baby Shower Card

My niece's baby shower was this weekend. I couldn't go (it was in the Chicago area) but this is the card I sent. I don't know what's coming, so I picked green/purple for the card!

I used a Copic marker to color the silk ribbon, which was white, to match the card.

Stamps: I Brake for Stamps
Paper: Basic Grey
Ink: Archival Coffee & Distress Ink
Accessories: Silk ribbon, Copics, rhinestones, Prima rose, EK Success fern punch
Technique Junkies: Antiqued Glimmers

Here's Jessica and "Julian" in Miami recently.

Tuesday, June 8, 2010

Tag Tuesday #55 -- These Are A Few of My Favorite Things

Louise's (Kard Krazy) challenge this week was to make a tag with a few of my favorite things. That one had me stumped for awhile. But hey - it's a TAG! That's #1 on my list. And Distress Inks - love what you can do with them!

I was playing around with tag backgrounds the other day - I called this a successful failure. Successful because I do like the end result, but a failure from the stand point that I didn't quite achieve what I was trying for. I wanted to mask the sentiment background.

But I didn't take into consideration the sentiment before I did the masking work. The area under the mask was sponged with Distress Ink Spun Sugar, then I laid the mask down and sponged Worn Lipstick. With the mask still on, I sprayed Glimmer Mist and sponged a bit with Broken China.

The butterfly was cut with a Nestablities butterfly die. I sprayed glue before removing the die and hit it with glitter. HINT: Soak the Nesties in rubbing alcohol to remove glitter/glue. (oops...)

Stamps: Memory Box SONOMA PRINT
Paper: tag
Ink: Distress Ink: Broken China, Spun Sugar, Worn Lipstick
Accessories: Prima flowers, pearls, ribbon, Nesties, glitter.

Monday, May 24, 2010

Paris Exposition Birthday

I struggled a bit with this card. It just seemed to unfinished!

The panel under the picture is tag with the top cut off. I really like how the Distress Inks and Glimmer Mist work with a tag. I think it's the tag finish. Anyway. The tag was distressed with different brown Glimmer Mists and brown Distress Inks. Then I over-stamped with some of the smaller images from Artistic Outpost's PARIS EXPOSITION. The image is also from that set. The faces were colored with Copics and the sky was water colored. It seemed unfinished to me until I stamped the "postmark" with red ink.

Stamps: Artistic Outpost FRENCH EXPOSITION & 7 Gypsies AVIGNON
Paper: tag, french book page, white
Ink: Archival black & Distress Ink
Accessories: Copics, Scrappers Floss, Glimmer Mist (Creme de Chocolat, Coffee Shop, Wheatfields), ticket, brads.
Technique Junkies: Faux Paper & Antiqued Glimmers

Sunday, May 23, 2010

GC53 - READ

For Gingersnap Creations theme of READ.

For the background I used Tim Holtz letter masks to cover a piece of white paper. Then I sprayed with Glimmer Mist. I blotted with another piece of paper - which came out very cool, I'll use it for a background on another card later. Then I hit it with the heat gun. I don't know what I was thinking - guess what? The letters melt! DUH! (grin) But when I pealed of the rest it was a great look. I sprayed some Wheatfield over the letters to tone down the white letters. The image is an old Stampin Up! set. And I ripped a page from an old French book I have. I also sprayed some Wheatfields on that and then gently rubbed it.

Stamps: Stampin Up! Knobbly Gnomes & Rough Type
Paper: kraft cardstock, french book page, white
Ink: Archival COFFEE & Distress Ink
Accessories: Copics, mini tags, Scrappers Floss, Glimmer Mist (Sapphire, Creme de Chocolat, Coffee Shop, Wheatfields), Tim Holtz letter masks.
Technique Junkies: Frame Frenzy - Torn Frames

Friday, May 14, 2010

Tag Tuesday #51 - Inspiration from Home

I love Louise's (Kard Krazy) Tuesday Tag challenge. It's a tag! So that had me. This week's challenge is "INSPIRATION AT HOME". My inspiration came from a book I just brought home - TAKING FLIGHT by KELLY RAE ROBERTS. I found it on the sale rack at Micheal's this week. What caught my eye were the ladies on the front but what made me buy the book was the incredible backgrounds and collages inside!

These three tags were all background experiments. All three were done with Dabbers (Raspberry, Citrus, and Pink Sherbet) and Glimmer Mist (Key Lime Pie, Dazzling Diamonds, and S.W.A.K.)

This background was done by rubbing the Pink Sherbet Dabber up/down the right side. Then I sprayed the other side with S.W.A.K. Glimmer mist. The green targets are the Citrus Dabber just lightly touching the tag and rolled. Below the dress I stamped Hero Arts SWIRL FRAME "inked" with Raspberry Dabber. The dress is Stampington & Co AUTHENTIC PARTY stamped on the new Cosmo Cricket DeLovely paper. "SPUNK" is a Basic Grey rub-on.

I think this is my favorite of the three. Again I rubbed the Pink Sherbet Dabber on the tag. Then I lightly rubbed the Raspberry Dabber along the edge. And sprayed with Key Lime Pie Glimmer Mist. And out came my mini bubble wrap again with Citrus Dabber. The large circles are a lid. The Hampton Art SMALL FACE FRAME was done on white paper in Archival Black. She looks like a Geisha to me. The lip and iris were colored with Copics (RV06 & YG13) and covered with Crystal Effects. The wings are Grungeboard covered with Pink Sherbet Dabber and Magenta Stickles.

This background is layered Glimmer Mist. Spray on a Teflon sheet and smooshed. Then dried with the heat gun. Repeat for layer after layer. Then more bubble wrap in Citrus Dabber. Finally I used Hero Arts LE LETTER stamp "inked" with the Pink Sherbet Dabber. The Stampendous RUFFLED BLOOM was also stamped on the same paper as the dress. Magenta Stickles and green glitter pen.

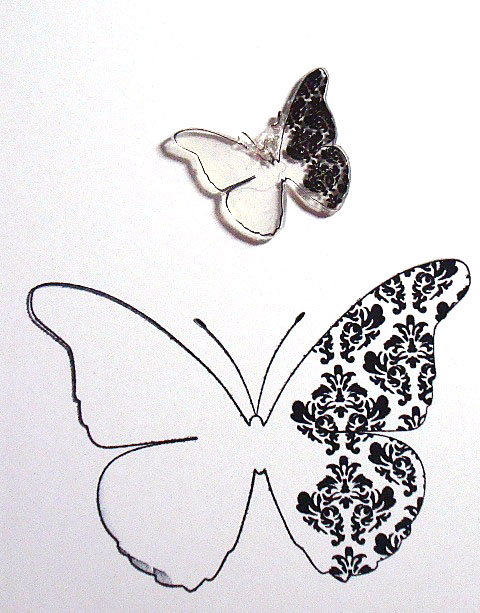
The butterfly in the corner is the new Memory Box Damask Butterfly stamped on shrink plastic and heated down to size. TIP: While the shrink plastic is still hot flatten it with a clear acrylic block. The rolled edges will lay down. I used the Citrus Dabber to color the back.

So, I'm down to 997 tags....

Tuesday, April 27, 2010

Bubble Wrap Mermaid Tag

I've been playing around with bubble wrap since I saw Shar post this tutorial on Gingersnap Creations. I had done several things (which I hope will get published) with the regular sized bubble wrap. Then I got a package that had mini bubble wrap and had to try some more!

So today I started with a white tag, embossed it with clear EP and then spritzed with Glimmer Mist. After it had dried I placed the tag between two sheets of typing paper and ironed off the embossing powder. Then I restamped with the bubble wrap and used a glittery EP powder (you can see it at the bottom of the tag).

Tag Tuesday's challenge this week is GLITTER. I stamped this little CRAFTY SECRETS mermaid with Archival and then did a Technique Junkies MARKER WASH on the mermaid and shells. After that was dry I went back with a glue pen and glitter. (LOVE THE GLITTER!) I tried to get a picture of all that shiny goodness but it's the wrong time of day. Trust me - WHOLE TAG JUST SPARKLES!

Here you can see the difference in size between the regular sized bubble wrap and the mini. Fortunately, I still have LOTS and LOTS of the mini left for other projects. Don't you love how the wrinkles in the bubble wrap translate on to the background?

Stamps: Crafty Secrets MERMAIDS
Paper: tag
Ink: Archival black & embossing ink
Accessories: glitter, bubble wrap, emboss powder (clear and Creations Unlimited: Caribbean Magic), Glimmer Mist (Lavender Fields & Sapphire), Martha Stewart branch punch, pearls, fish sticker, ribbon, and dry wall joint tape