

Second, I was so excited to see this month’s HERITAGE theme. For the last 10-15 years, I’ve been an avid genealogist. I am currently the archivist of my family’s stories, photos, and details. I’ve bugged my Mom and Aunts relentlessly to share with me their knowledge. They’ve been very generous with their time and stash of photos. A large amount of those photos came as CABINET CARDS. Cabinet cards became popular after the Civil War (cir 1870-1880) as portrait photography. They are generally 4x6, black and white (sometimes hand-tinted), on sturdy pressed paper cards.
Third, Let me say…this is MY METHOD for cropping, resizing, and adjusting photos. I know there are easier ways (for example, it can all be done in Photoshop) but this works for me. Please adjust to meet your needs.
So let's play with 3 of my favorite “Great-greats"!
 Meet my Great-great-grandfather, Nels Anderson. Nels left southwestern Norway in 1856 at the age of 20. He settled in Wisconsin and worked for several years as a farm hand. When he had $300 saved he went back to New York, got on a ship bound for Panama, WALKED across the Panama Isthmus, got on another ship bound for San Francisco, and joined the California gold rush (10 years late - 1859). What he did there remains a mystery (for now - I'm hoping to find out one day), but he eventually returned to Wisconsin and married Christina (below).
I started by scanning Nel’s photo. I crop and resize in Microsoft Office 2010 (in earlier editions it’s called Microsoft Office Picture Manager). Select your photo in the folder, right click, selected “OPEN WITH” select Picture Manager (you can check the box at the bottom to make this standard), and EDIT the photo. If you make it a standard, you can right click and EDIT, without the other steps.
 I start by cropping to the size I want. Use your mouse to move the brackets to frame the edges of the photo. I didn’t need all the white cardstock around the photo, so I removed it.
 Next I resize. This just means making it a standard pixel size. You probably won’t notice a difference other than the size of the JPEG file. I always select WEB – LARGE 640x480.
 And then I save and exit from Picture Manager.
 ***WARNING: I have Photoshop – but I’m new to it and can’t do much other than adjust the light/dark settings.***
Press Ctrl+L ("Ctrl+L" = pressing both the Ctrl key and L at the same time) and the little levels box will display. I move the arrows in on both sides until they are under the first spike. You can move the middle arrow to the left to lighten the picture. Press OK. This is generally where I finish editing my pictures. Ctrl+S will bring up the Save box.
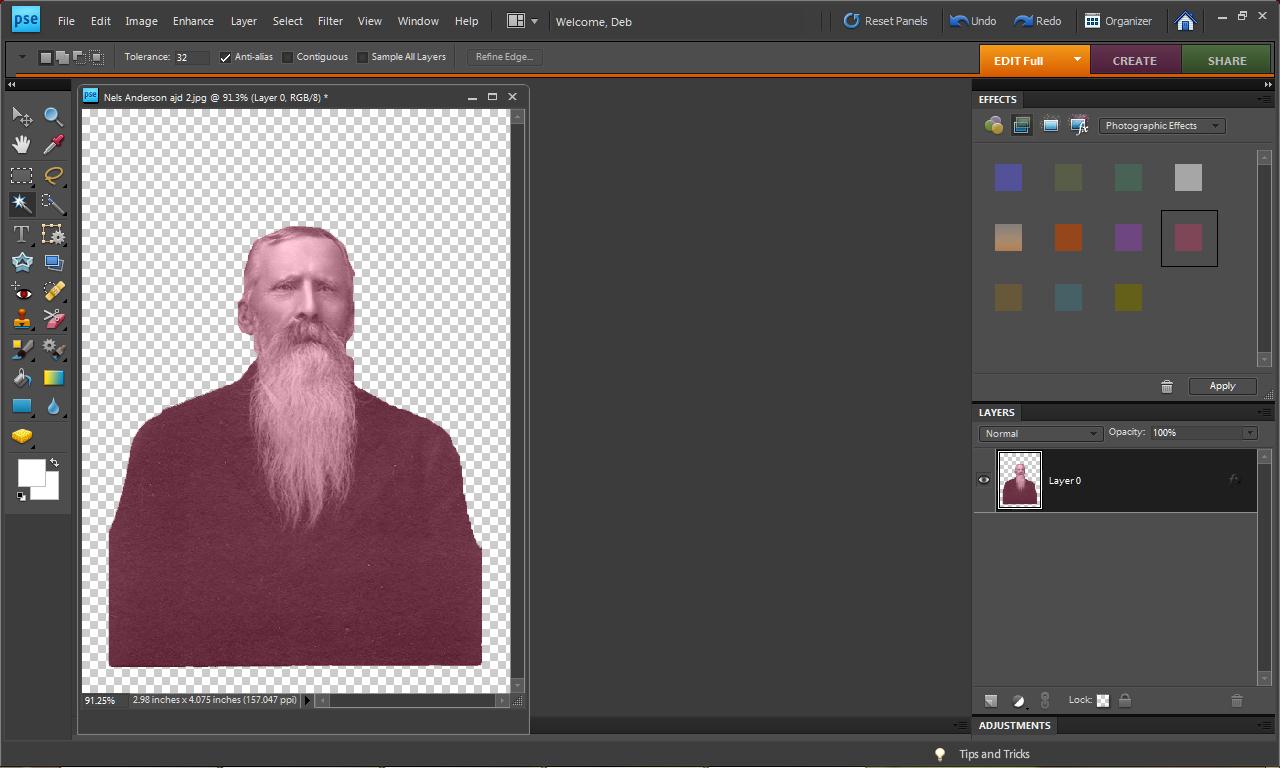 But I wanted to try colorizing Nels for this project. (I removed the background but it's not necessary.) Under WINDOWS open the EFFECTS - PHOTOGRAPHIC EFFECTS. Click on one of the colors and drag to your photo. Ctrl+z will reverse the colorization. When you're happy -- SAVE IT!
So, let’s be honest here…I love Nels’ beard but honestly he looks a bit like a garden gnome. (am I right?) So I paired him with Retro Art Café’s Vintage Botanical Images Collage Sheet by Debrina Pratt - DP188. (I think he's approve of being a gnome...he was a farmer after all).
Just a final note. I also have received a few tintypes (depending on the developing method they are called different things, tintype is a generic term). These are photographs that were chemically etched onto tin/metal sheets. Exposure to light and air degrades the image over time. Most of the tintypes I have now are nearly black. As a result the images are almost gone. To my knowledge there is nothing you can do to restore the image on the metal. If you have any tintypes, I encourage you to get them scanned and digitally preserved ASAP! If you don’t have a scanner, most copy shops can do it for you. A one-time scan will not do more damage, but will preserve the image for future generations.
I used Photoshop to clean up these two tintypes:
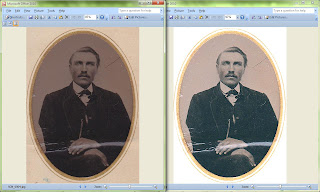 My Great-great-grandfather, John Quammen.
 My Great-great-grandmother, Christina Williams Anderson (Nel’s wife).
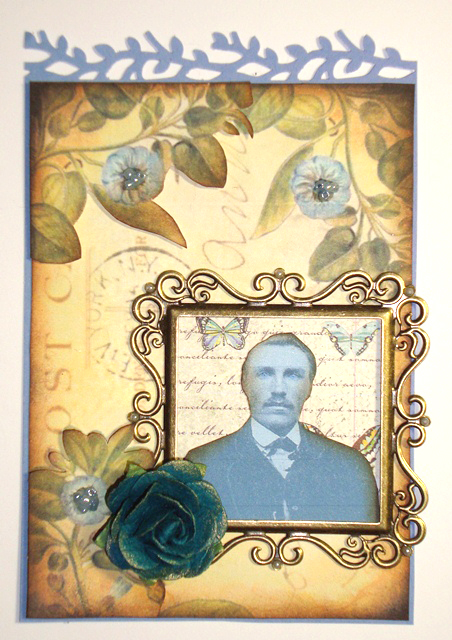
And here they are “Glammed Up” on those great Retro Art Café backgrounds!

I hope I’ve inspired you to preserve (and have a little fun with) your ancestors!!
Wow!!! Love this!!
ReplyDeleteGenealogi is very close to my heart to.
Now I know how to use all the photos I scanned... Thank you so much for the inspiration!
What a fab way to use cabinet cards! Love your awesome examples! Thanks for sharing how you made these!
ReplyDelete